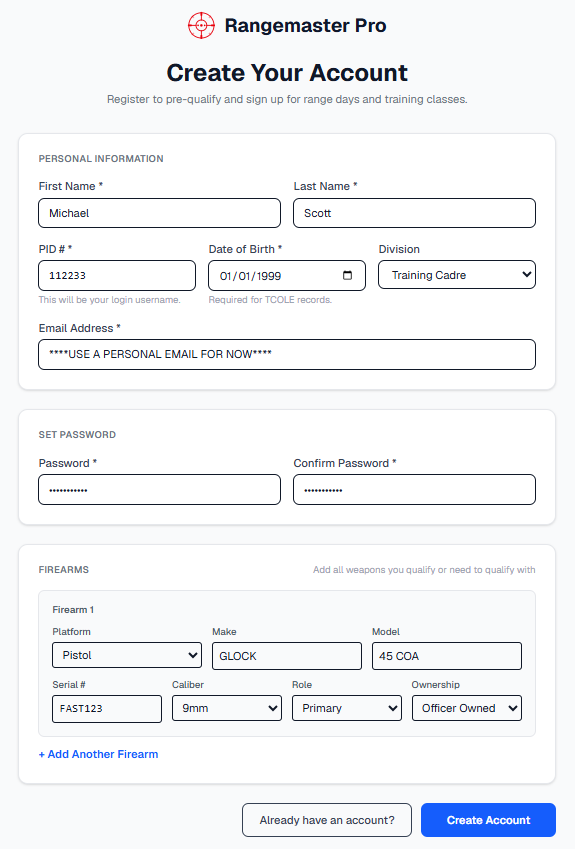
Create Your Account
First-time setup — takes about 5 minutes
Use Chrome, Firefox, Edge, or Safari on any device — phone or computer both work.
All fields marked with * are required. See the field reference below.
| Field | What to Enter | Required |
|---|---|---|
| First Name | Your legal first name | Yes |
| Last Name | Your legal last name | Yes |
| PID # | Your badge or employee number — this becomes your login username | Yes |
| Date of Birth | Required for TCOLE records and qualification scheduling | Yes |
| Division | Select your assigned division from the dropdown | Optional |
| Email Address | Your agency or personal email — used for notifications | Yes |
Must be at least 8 characters and include an uppercase letter, a lowercase letter, a number, and a special character (e.g. !, @, #). Enter it twice to confirm.
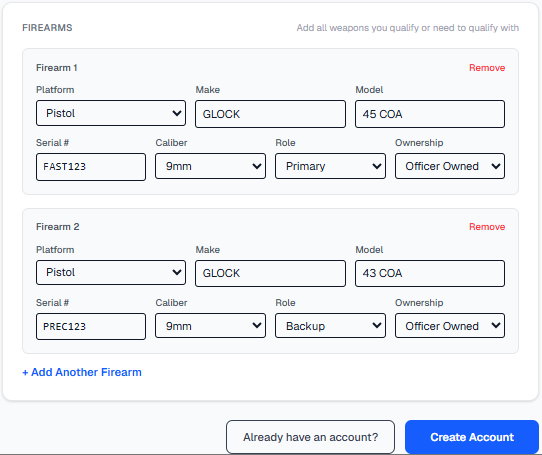
Enter at least the firearm(s) you carry or qualify with. You'll need the platform, make, model, and serial number. You can add more later.
The system will verify your information against the agency roster.
Request a Role (Optional)
Only if you have a specific assignment beyond standard officer
After your account is created, you'll see a screen asking if you'd like to request an elevated role. This step is optional — most officers can skip it.
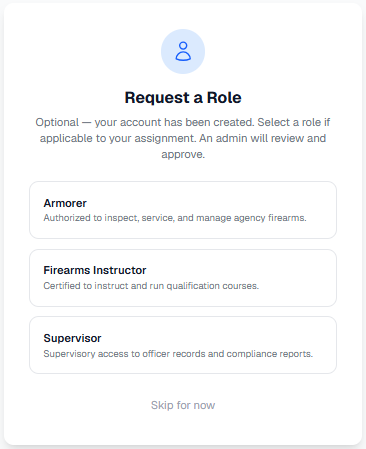
| Role | Who Should Select This |
|---|---|
| Armorer | Personnel authorized to inspect, service, and manage agency firearms |
| Firearms Instructor | Certified instructors who run qualification courses |
| Supervisor | Supervisors who need access to officer compliance reports |
Account Status After Registration
What the confirmation screen means
After submitting, you will see one of two screens:
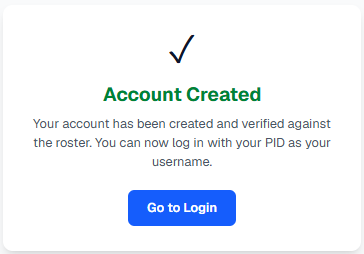
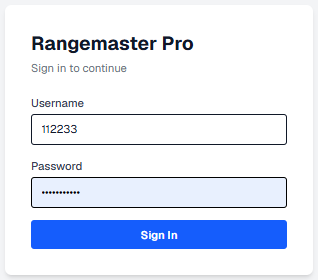
Log In for the First Time
Your PID is your username
Click "Go to Login" from the confirmation screen, or navigate to /login on your agency's Rangemaster Pro address.
Your PID is your badge or employee number — the same one you entered during registration.
You'll be taken to your officer portal dashboard.
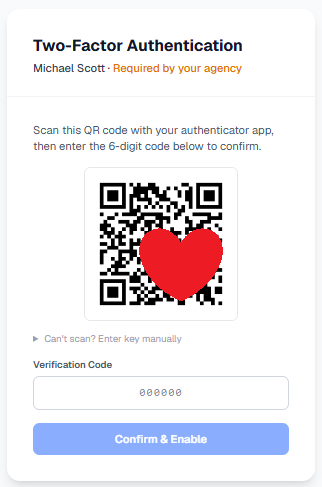
Set Up Two-Factor Authentication
Required by agency security policy — takes 2 minutes
Use Google Authenticator, Microsoft Authenticator, or Authy — all are free. Install it from the App Store or Google Play before continuing.
If you are not redirected automatically, click Two-Factor Auth in the bottom-left sidebar. You will not be able to use the portal until MFA is set up.
This generates your personal QR code. The QR code does not appear until you click this button.
Open the app, tap the "+" or "Add account" button, then point your camera at the QR code on screen.
The code refreshes every 30 seconds. Type the current code and click the button. MFA is now active.
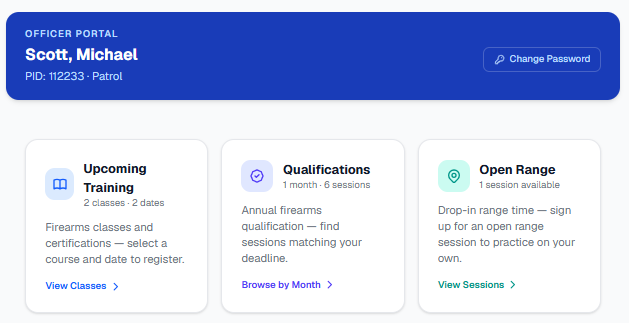
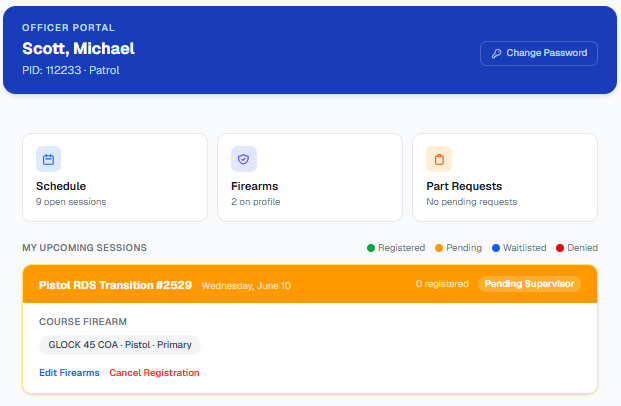
Register for a Range Session
Signing up for qualifications, training classes, or open range time
The Schedule tab shows three types of sessions your range staff has opened for registration. Each type is its own card.
| Session Type | What It Is | When to Use It |
|---|---|---|
| Upcoming Training | Firearms classes and certifications — e.g. Basic Patrol Rifle, Less Lethal, TCOLE courses | When you need to complete a class or earn a certification |
| Qualifications | Annual firearms qualification days organized by birth month | When your annual qualification deadline is approaching — find the session that matches your birth month window |
| Open Range | Drop-in range time with no structured course — practice on your own | When you want extra trigger time, remediation practice, or to maintain proficiency between quals |
For Training, you'll browse by class name then pick a date. For Qualifications, select your birth month to see sessions matching your deadline. For Open Range, you'll see a flat list of available dates.
You'll be asked to confirm which firearm(s) you're bringing. Some sessions also ask you to select a caliber.
Some sessions require supervisor or admin approval — you'll see a "Pending" status until approved. Others confirm immediately.
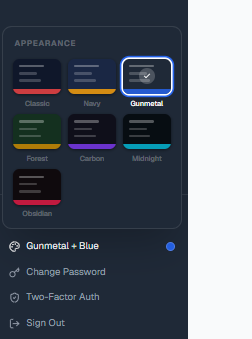
Personalize Your Portal
Optional appearance settings
At the bottom of the left sidebar, click the palette icon next to your name. A pop-out grid shows all available themes — click any swatch to switch instantly.
Go to Settings in the sidebar, or (for officer portal users) look for the Change Password link at the bottom of the sidebar.
Enable Notifications & Install the App
Get alerts for new sessions and approvals — on your phone or desktop
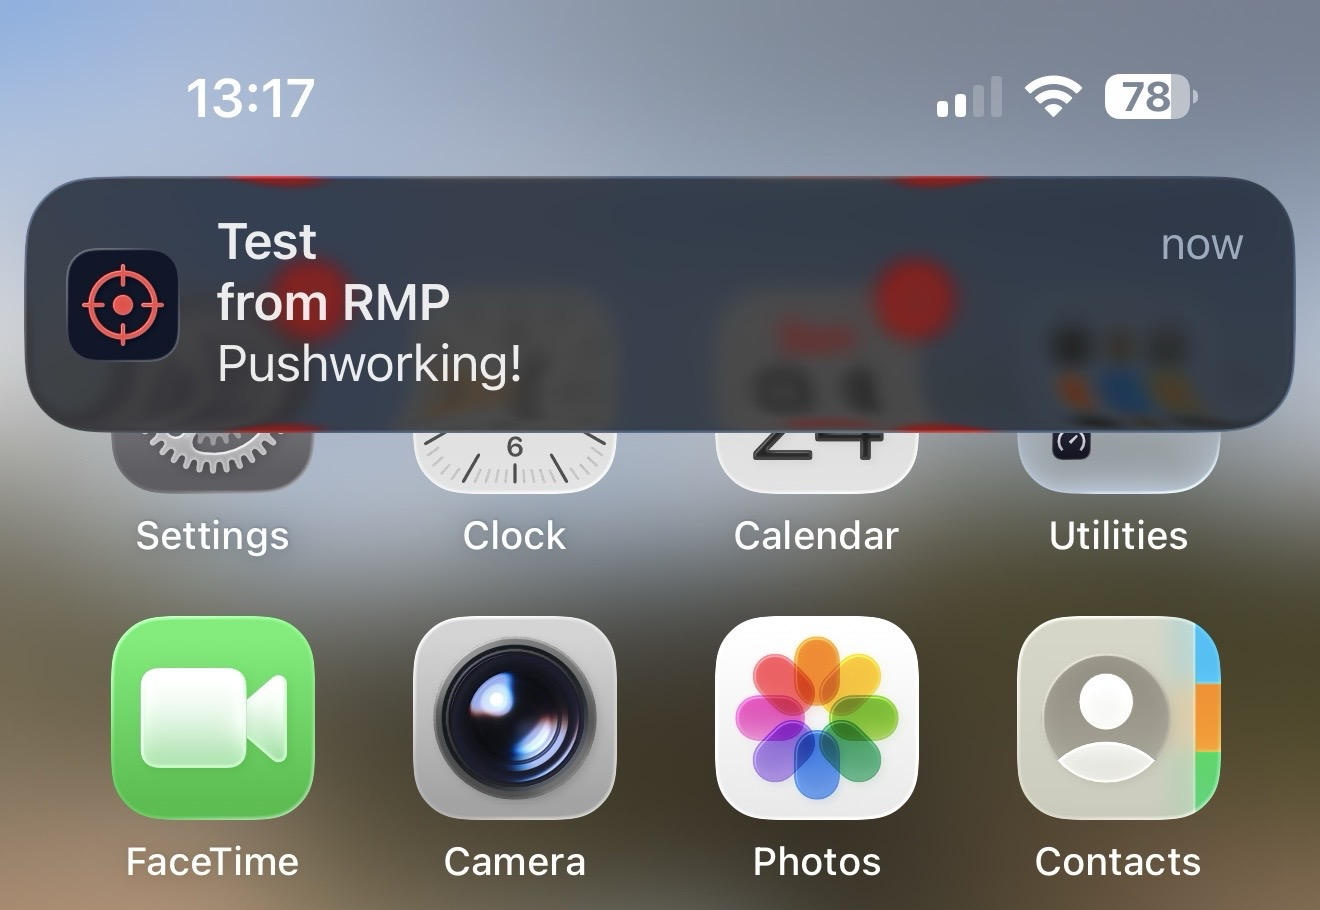
Rangemaster Pro can send push notifications to your phone when new training sessions are posted or your registration status changes. Setup is slightly different depending on your device.
🍎 iPhone (iOS)
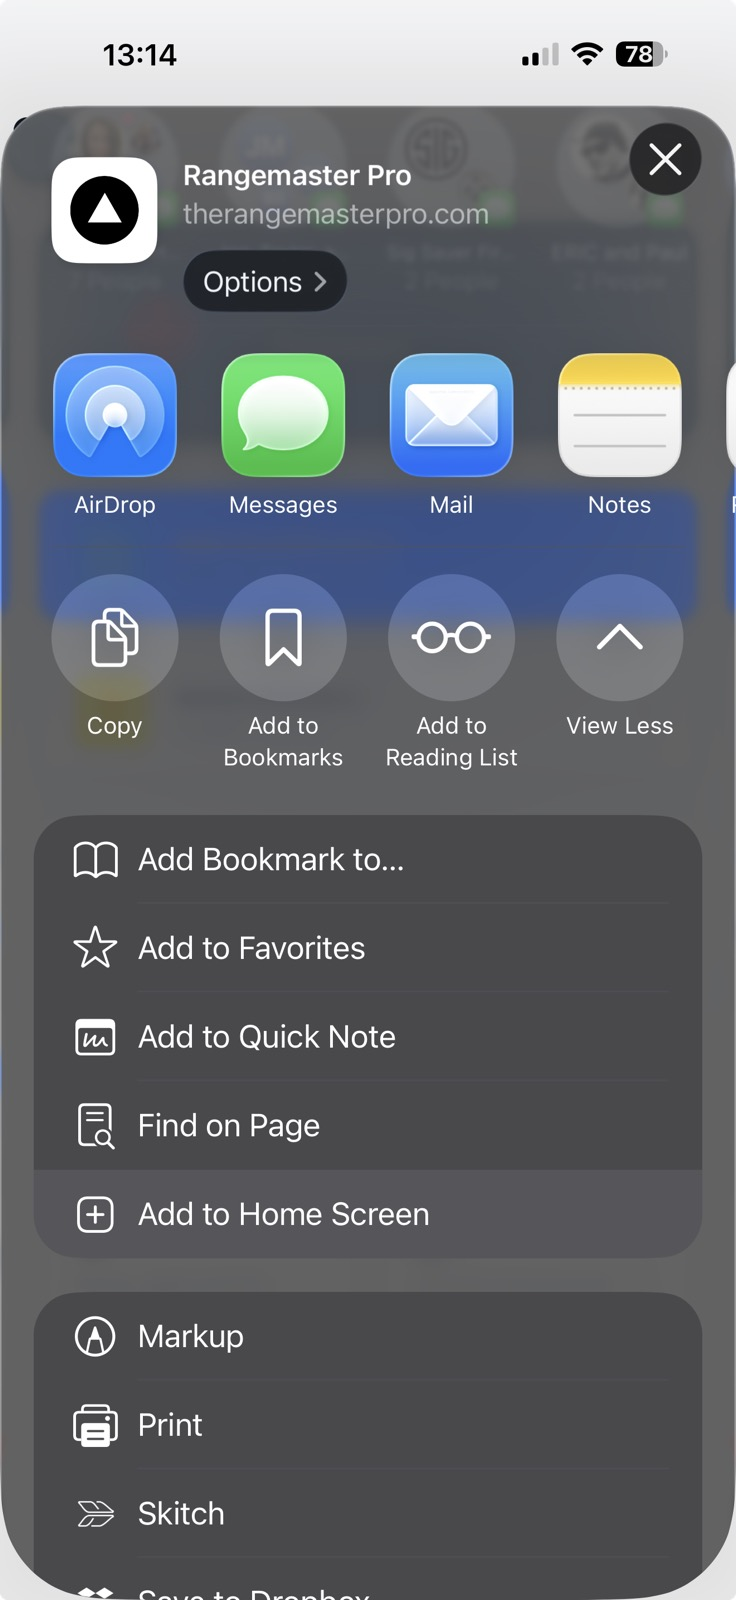
- Open therangemasterpro.com in Safari
- Tap the Share button (box with arrow)
- Tap Add to Home Screen
- Tap Add to confirm
- Open the app from your home screen icon
- Tap Allow when asked about notifications
🤖 Android
- Open therangemasterpro.com in Chrome
- Log in to your account
- Tap Allow when Chrome asks about notifications
- Optional: tap the install banner or ⋮ → Add to Home Screen